
FOOD FIGHT: 2 WAYS WITH LEMONS

My little lemon tree is a real survivor. When I planted my tree some five years ago, it was placed in a hole strewn with old roots, in a garden that has major drainage issues, and all through winter my little lemon tree has sat in it's very own swimming pool. It really has fought hard to establish itself. It's first year it produced one hard lemon, then nothing the following two years. But this year, little suns popped up in the corner of my garden, and lifted my spirits. The only problem was I had to swim across the lawn to get them. So this food fight is in celebration of my tough little lemon tree and soggy Ugg boots. Enjoy Ingrid
Vanessa's dish - Homemade pasta with lemons, capers and olive oil
Lemons are abundant this time of year, so much so that they are often left rotting under swelling lemon tress. Such a shame. I have one such tree next door and every year its bursting at the seams and it appears its only me collecting the rewards. Usually its either for lemon and honey drinks, a squeeze or two over fish or to look fresh and inviting in a big glass bowl on my dining table.
 |
Lemons add a touch of summer to a long winter
|
For our 11th food-fight I pondered with the idea of something sweet and zesty but the trouble is I always lick the spoon and spend a couple of days scoffing the treat!
I have just started a 10 week challenge at the gym and because I have low willpower when it comes to food, I have opted to use the lemons in a savoury dish. To zoosh it up a bit so its not just adding a squeeze to a dish I have attempted homemade fresh pasta.
I have just started a 10 week challenge at the gym and because I have low willpower when it comes to food, I have opted to use the lemons in a savoury dish. To zoosh it up a bit so its not just adding a squeeze to a dish I have attempted homemade fresh pasta.
 |
Fresh homemade fettuccine - delicious
|
Fresh pasta is actually pretty easy to make, not much can go wrong with the dough. Rolling it out takes a bit of getting used to but its worth the effort. The trouble I had was the dough/pasta sticking together after I placed it onto a plate - even with extra flour. (any suggestions - please comment)
What amazes me, is the cost of fresh pasta in the supermarket, like with my cheese making its not actually the ingredients that adds to the cost, its the process and the time - home made pasta is in this category. But once prepared, cooking it is a breeze and it lasts for about 3 days in your fridge.
Homemade pasta with lemons, capers and olive oil
You will need
500grams flour
4 eggs
2 tbsp olive oil
Water to mix
How to make the pasta dough
In a bowl (or on the bench) measure out the flour. Add the eggs and olive oil to a well in the centre and mix them up taking a bit of flour from the sides of the well. Keep doing this until its coarsely mixed.
Add a bit of water to make it into a smooth dough. Knead Knead Knead for about 10 minutes. You will need to add flour as you go along to stop it becoming sticky. When you have kneaded it for 10 minutes, wrap it in glad wrap and put it in the fridge while you make the pasta sauce.
Pasta sauce
you will need about...
1/2 cup olive oil
1/2 cup lemon juice
1/4 cup capers
Salt and pepper to taste
2 chopped tomatoes
1 chopped onion
6 cloves of garlic (depending on how garlicky you like it)
Shrimps or prawns (shelled or not)
Saute the onions and garlic in a little oil until soft, throw in the chopped tomatoes and capers and briefly cook. Add the oil and lemon juice and heat through. Finish with salt and pepper and chopped coriander or basil.
Now its time to roll out the pasta.
If you have a pasta maker, put small flat balls through the non blade rollers and keep thinning the dough by reducing the width of the rollers. When it's about 2-3mm thick, feed it through the fettuccine rollers. If you don't have a pasta maker, you can just use a rolling pin and a knife - it might even be easier. Apparently you can roll up the thinned dough into a tube shape and cut through so you get long ribbons.
My tip is to constantly add flour to prevent sticking and avoid the spaghetti rollers as I found them too small and the dough kept getting stuck.
Boil a large pot with salty water, I heard Ray McVinnie on NZMasterchef say it needs to be as salty as the sea. When its boiling, add the fresh pasta and cook until al dente or firm to the bite. Approx 5 minutes. Whilst this is cooking reheat the lemon and oil sauce and sauté the shrimps briefly in their own pan. When the pasta is cooked, drain and add the lemon sauce then toss through the shrimps. Serve with chopped herbs. Bellissimo!!!
 | ||||||||||||||||||||||||||||||||||||||||||||||||
Fettuccine with lemon, capers and shrimp - simple and fresh
Confession - during the final photo shoot I headed to Ingrid's house with everything and the kitchen sink but arrived and realised I left the pasta sitting on my kitchen bench! GUTTED! Time wasn't on my side so I raced to the supermarket to get store bought pasta for the shoot and our lunch! When I arrived home hungry and Jake was in bed I feasted on my own fresh pasta, sauteed frankfurters, store bought pasta sauce fired up with chili and capers.
All I can say is totally satisfying and delicious - I will be making my own pasta again!
Vanessa
Ingrid's dish - Lemon Tart
I was so impressed with candied lemons, sticky and gooey and sweet but still with the tartness. I would also recommend using them on top of a cake (lemon or vanilla), with the sticky sweet lemon juice dripping down the sides - no need for any icing.

Lemons were more successful than limes, the limes skins were tough whilst the centres disintegrated.
Lemon and lime tart with candied lemons
What you need
Pastry
125g butter (cold, and cut into cubes)
100g (1/2 cup) caster sugar
1 x egg
1/2 tsp vanilla
1 tsp lemon zest (grated finely)
250g (2 cups) flour
How to makeIn a food processor, blitz the butter and sugar until just combined. Add beaten egg, vanilla and zest, lightly mix. Add flour and process until crumbly. Don't over mix. Should only need a few seconds. Knead lightly on a floured surface, wrap in plastic wrap and refrigerate for 30mins.
Roll pastry on floured surface until large enough to fit loosed based flan tin 24cm. Grease tin. Lift pastry into tin. Press into sides. Trim edge. Cover with plastic wrap and refrigerate for another 30 mins.
Preheat oven to to 200C or 180C fan forced oven. Remove plastic wrap, and line with foil, making sure the foil goes over the edges. Add rice or beans for blind baking. Blind bake for 10mins. Remove rice or beans and foil and bake for another 5 mins. Reduce oven temp to 160C / 140 fan forced. Let cool.
Lemon and lime zest filling
What you need
5 eggs (3 whole, 2 yolks only)
3/4 cup caster sugar
1 x lemon (juice) approx 50mls plus zest
1 x lime (juice) approx 50mls
200mls cream
50g butter (melted)
How to make
Whisk eggs, yolks and sugar until creamy. Add cream and melted butter. Mix in lemon and lime juice and lemon zest. Whisk. Pour into cooled pastry.
Bake for 40 mins until filling has set. It should have a slight wobble in the centre when ready. Cool.
.

Candied lemons
What you need
1 1/2 cup of caster sugar
2/3 cup water
3 lemons (sliced thinly) (My candied limes weren't so successful, so just stick to lemons.)
How to make
Put sugar and water in a pot on medium heat, and stir until sugar dissolved. Add sliced lemons and bring to the boil. Cook until the liquid thickens. Around 10 mins. Let cool and place lemon and lime candied slices on tart. Pour syrup into a jug. Serve with yoghurt and warmed up lemon syrup. Enjoy
FOOD FIGHT: 2 WAYS WITH YAMS
Our tenth food fight, Wow! We started with eggplants in February licked our lips over peach sweets in March, made good use of a bucket load of basil, decided chokos were actually quite special and mastered some homemade pasta in June and we are still enjoying the healthy competition every fortnight.

We have even upgraded our setup, with some fancy pancy lights (a new studio light kit, with standy uppy lights and a free sand bag! very important when your clumsy) and a really expensive lens to add to our shared photography kit, a Canon 100m 2.8m. Thank you to a very helpful Graeme Buckingham from http://www.photowarehouse.co.nz/.
We aren't really sure yet quite what it does,or whether it will make us look better than we actually are! but all the food bloggers who are anyone have one, so that seemed like a good enough reason. So we are amped to experiment and see what we discover. So look out for some experimental food photos coming your way soon.
I've never ever cooked with Yams, but I fell in love with their colour on a recent trip to the Avondale Markets (Auckland). So that's a good enough reason to make them the subject of our next food fight.
Yam facts
Ingrid's dish: Chilli and lime yam wedges
I love potato and kumara wedges, you can take your french fries or chips back, give them to someone else, I don't want your skinny strips. Yams are the right size and super easy to make into a wedge, and they lend themselves well to a bit of spice. I thought these would look great as an appetiser for a party, you could add a creamy aioli or a dip.

Chilli and lime yam wedges
What you need
Makes enough for 2
500g of yams (sliced lengthways)
2 tbsp olive oil
1/2 Lime (for serving)
Seasoning
1 tsp chilli powder
1/2 tsp paprika
1/2 lime zest grated
1/4 tsp garlic powder or throw a couple of peeled garlic cloves on baking tray
1/2 tsp cumin
pinch of brown sugar
1/2 tsp sea salt (to taste)
How to make
Line a baking tray with baking paper, brush with olive oil, lay yams skins down. Brush with olive oil. Combine all seasoning ingredients or grind in a mortar and pestle until you have a fine powder. Scatter over yams. Bake at 180C for 35 mins (turn half way) or until golden. Serve with lime.
Vanessa Dish: Honey baked yams
They are super simple to cook and cook quite fast because they are so small. I decided to throw them in with a roast dinner, but jazz them up a bit with a honey and spice coating.
Don't be scared and give them ago. If your kids like potato, they are sure to like the sweet sticky cute yams!
Honey baked yams
What you need
500grams Yams
2 tbsp Honey
2 tbsp Olive oil (or vegetable)
Salt/pepper
2 tsp spice mix - try chili, ginger, lemon pepper, harrissa mix, chili and lime seasoning. (I used ginger)
How to cook
Melt the honey and add about 2 tsp of spice mix to the honey. Drizzle over the yams and season with salt/pepper to taste.
Bake in the oven along side your roast meat for about 20 - 30 minutes. They are ready when soft. (just like potatoes, stick your fork in to test)
Enjoy, Vanessa
PS - I love Ingrid's idea of serving them with aioli - go the whole hog and serve this with your roast too. Make sure it's extra garlicky!
FOOD FIGHT: 2 WAYS WITH POTATOES
Even though we are sisters, we have a very different approach to food and photography. Each fortnight we are going to choose the same ingredient or theme and post the result. These are the results...
Potato facts
Vanessa's dish: Chicken and potato curry
I find it strange that although this curry is packed with spuds, Lewis still eats his with rice. He would never ever eat a curry without rice. Me on the other hand rarely have it with rice, I pack the bowl full of baby spinach leaves and pile on the curry with an extra scoop of the juices.
This curry is remarkably simple and uses things I bet you already have in your kitchen. The trick is the technique and being able to add more or less as you go along...
Every time he makes a curry it's different, but always delicious. I never buy curry from takeaway shops especially knowing how easy and quick it is to make.
I will do my best to describe the process, so give it a go and good luck!
Lewis's chicken and potato curry
What you need
Chicken-either thighs or be brave and cut up a whole chicken (Adding the bone gives more flavour but I like boneless thighs) About 8 thighs is perfect for 4 people.
Approximately 3-4 tablespoons Curry powder - mild, medium or hot - anything goes
1/2 cup Vegetable oil
1/2 cup water
2 onions
1 bulb of garlic
1 small piece of ginger
1 teaspoon of mustard seeds
1/2 teaspoon cumin seeds
Agria potatoes - peeled and chopped into large cubes
Fresh coriander
Rice, roti or nan bread
How to make
(this is the tricky bit - its more like a bit of this, a bit of that and you get better, the more you make it!)
Preparation
Finely chop the onions.
In a mortar and pestle pound the garlic and ginger with salt.
Chop the chicken in to bite-sized pieces.
Peel and chop the potatoes into large cubes.
Roughly chop the coriander leaves and stalks.
Lets cook
Saute the onions in the vegetable oil. ( I would typically use less oil BUT it does give the curry a better flavour with more)
When slightly brown, add the cumin, mustard seeds, garlic and ginger. Fry to release the flavours briefly.
Add the curry powder and do the same then add about 1/2 cup water.
Add the chicken and give it a good stir around to totally coat the chicken.
Put a lid on and turn up the heat and cook for about 10 minutes until the chicken is cooked.
There should be enough liquid in the pot but at this stage you can add a bit more water.
Add the potatoes, and salt then simmer until soft - another 15 minutes or so should do.
Taste and add more salt if needed.
When ready add the coriander and serve hot.
Never buy takeaway curry again!
Ingrid's dish: Spinach gnocchi with pesto and toasted pine nuts
My darling Italian grandmother is an expert at gnocchi, and my dad is a close second, so I thought it was my time to try and create the lightest, softest Italian dumplings and hope to live up to their reputations.
I always thought you had to turn your kitchen upside down with flour and sticky dough because that's how I saw my Nonna and father do it. And in true familial style, that's exactly what I did! I went about mashing potatoes and chopping garlic, and kneading with gusto, the mess felt well deserved.
There are some food products that you should never buy from the shop, and gnocchi is now coming off my shopping list. Say NO to stodge! My home-made gnocchi was bellissimo!
A little messy but not in anyway difficult, you will find most ingredients in your pantry or fridge, and you can make it your own, by adding different spices, herbs and ingredients.

I used store-bought pesto to mix through the gnocchi but if you have got the time and the basil, Try Vanessa's recipe for home-made pesto http://foodopera.blogspot.com/2011/03/march-food-fight-two-ways-to-use-basil.html
Toasted pine nuts finished the dish off, and it was given five stars by the bloke and my son, in fact we had it again the next day, even though the dough was quite sticky and needed some extra kneading and flour. I think this might be my most successful dish thus far. Enjoy
What you need (serves 4)
Gnocchi
4 large potatoes (mashing potatoes such as agria) - chopped/ cubed
2 egg yolks (beaten)
2 Tbsp milk
salt/ pepper
4 nobs of frozen spinach defrosted (or a bunch of chopped and wilted fresh spinach)
1/3 cup Parmesan cheese (extra for garnish)
dusting of flour
Pesto: I used store-bought but if you want to make your own see Vanessa's recipe for pesto http://foodopera.blogspot.com/search/label/Pasta
I also threw a handful of pine nuts into a fry pan and toasted them until golden, and sprinkled them over the top of the gnocchi to finish.
How to make
In a pot, add water and boil potatoes until soft. Drain water and mash potatoes. Add egg yolks, milk, salt and pepper. Mix through spinach and parmesan cheese until you have a dough. Don't over mix.
On a floured surface, roll into logs, adding flour when the dough gets too sticky. Cut into 1.5cm rectangle shapes.
Drop gnocchi into salted boiling water in batches, for about 3 mins or until the gnocchi has risen to the surface. Remove with a slotted spoon.
In a pan, heat pesto and lightly mix gnocchi into sauce. Place on a plate and scatter toasted pine nuts, and grated parmesan.
FOOD FIGHT: 2 WAYS WITH
BRUSSEL SPROUTS
I never grew up with brussel sprouts, I never had to endure a miserable soggy boiled sprout that was forced upon me, just so I could leave the table. My sprout memories are good, in fact I have great sprout stories of crunchy, flavoursome, good looking sprouts that I can't get enough of.
And for this reason, our sixth food fight was decided. I wanted other people to experience sprout fever, which is happening in my house at the moment.
Vanessa actually introduced me to this super fast and simple dish and during sprout season, this is my 'go to' for when I need to whip up dinner in a hurry. I almost always have this with eye fillet steak, (seasalt and cracked pepper, medium rare 4 mins each side). Ingrid
Brussel Sprouts sauteed in Wholegrain Mustard
Enough for 4 (8 halved sprouts each)
What you need
16 Brussel sprouts (remove the outer leaves, cut off stalk and halve)
2 Tbsp Olive oil
2 Tbsp wholegrain mustard
What to do
Ok, I know I said boiling is the reason sprouts have got a bad rap, but you need to boil them only for 4 mins to soften them ever so slightly.
Don't overboil! Drain in a colander, drizzle olive oil and mustard then sauteed them in a pan on medium high heat, tossing them frequently until the sprouts have crisped up.
Brussel Sprout facts
Vanessa's Dish - Roasted Sprouts
As Ingrid said we were fortunate to NOT grow up with soggy sieve through your teeth vegetables and brussel sprouts are not a memory from my childhood. My earliest memory would have to be whilst in Europe, in particular Ireland. Christmas dinner was never complete without the good old sprout!
I was Comme ci, comme ca about them as they were usually just boiled. I like flavour, crunch, spice and excitement - plain boiled veges are not my cup of tea.
I really don't know how the brussel sprout and a mustard dish came about - they just marry perfectly and are pleasure to eat.
My challenge was to create another dish to add to the "I love sprouts" fanclub!
Initially I though of sprouts with a cheesy sauce but being a busy mum with a sometimes clingy and demanding three year old - quick and easy was going to be my motivation!
Roasting - I love roasting things, its super easy and you cant fail at it BUT can you roast a brussel sprout?
Often I check with my buddy Mr. Google, this time I just threw it all in to the pan drizzled it with olive oil and salt and hopped for the best.
Voila - beautiful and tasty brussel sprouts - easy and different.
Roasted sprouts
What you need
Brussel sprouts with any yellow leaves taken off and the bottoms cut off.
Garlic bulbs
Any other vegetables that roast well (carrots, parsnips, kumara)
Olive oil
Salt
How to make
Prepare vegetables
Throw into roasting dish
drizzle with Olive oil and salt
Roast for about an hour - keep checking the sprouts as the leaves can crisp up and burn. You may have to remove them prior to the other vegetables being cooked.
Enjoy and wow your family!
Vanessa
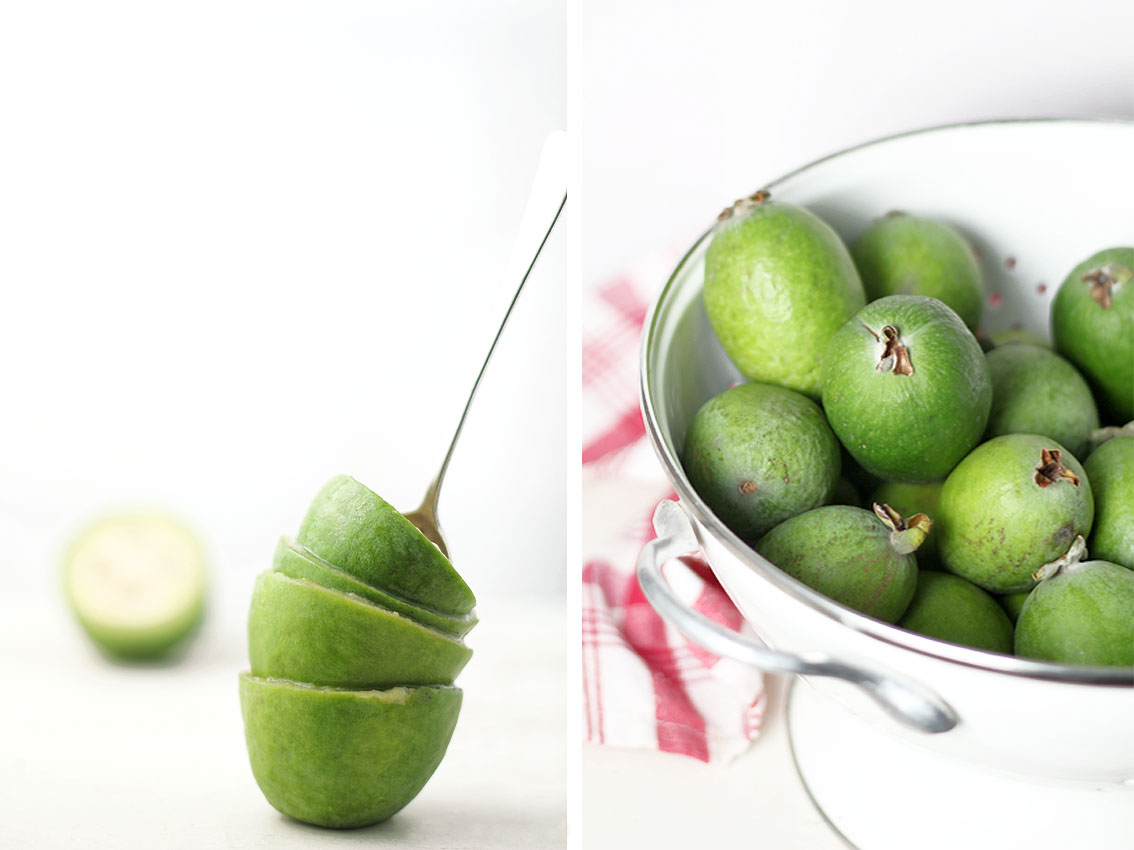
FOOD FIGHT: 2 WAYS WITH FEIJOAS
Even though we are sisters, we have a very different approach to food and photography. Each fortnight we are going to choose the same ingredient or theme and post the result. These are results of our fourth food fight.
Feijoas
Vanessa's Dish - Pork Scotch Fillet stuffed with Prunes and a Feijoa Sauce
Ingrid suggested Feijoas for the next food fight, maybe she is a closet feijoa lover? I, however, never really got into them. I remember travelling and meeting other Kiwis and when the discussion came around to what we missed from home, feijoas featured highly. The love of feijoas even extends to wine and vodka - both interesting but I think I am going to stick with my grape Chardonnay thankyou!
This coincided with an opportunity to start compiling images for publication in some magazines. The brief was seasonal produce with recipes and photos of both the before and after... Off to the fruitshop I went searching for the perfect feijoa.
I decided on making a savoury dish with my feijoas, one inspired by a restaurant I worked in whilst at university. My twist is the feijoas!
What you need
Scotch fillet of pork
12 Prunes
2 Onions
Olive oil
Salt and pepper
8 feijoas
A heavy casserole dish with a lid
A food processor or blender
How to make
With a long knife make a cut through the length of the fillet.With your fingers, stuff as many prunes as you can in to the fillet. Season with salt and pepper and coat with olive oil. In the casserole dish add a bit more oil and brown the fillet all over.When brown, add the onions and put into a warm oven (about 160 - 180 degrees). Bake for about half an hour - this depends on the size of your fillet so keep and eye on it and don't overcook. When ready, take out of the dish and set aside to rest. (Its a good idea to wrap in tin foil at this stage)
Feijoa sauce
Scoop out the feijoa flesh and add to the pot that should have a bit of juice in the bottom. Simmer until the feijoas are soft. Stir occasionally so you get the lovely flavours from the bottom of the dish. When the feijoas are soft, blend until smooth. Taste and if needed add additional salt and pepper or even a bit of sugar if its too tart. I didn't do either!
Serve over the rested pork.
This would go great with a simple baby spinach and beetroot salad. Enjoy
Ingrid's Dish - Feijoa bread and butter puddings
Feijoas are everywhere at the moment, rubbish bags of feijoas kept turning up at my office, the neighbourhood children are using them as missles, the tree next door keeps off-loading them all over my driveway, and the funniest sight of all is the up turned bums protuding out of all the bushes - foraging is alive and well in my neighbourhood.
So if you aren't sick of the site of the humble feijoa (and being 'outed' as a feijoa lover, I'm not!), and your feeling a bit autumnal, these mini feijoa puds will warm your tastebuds.
Feijoa bread and butter puddings
Makes 4
What you need
1 1/2 cups single pouring cream
3 eggs
1/2 cup caster sugar
1 tsp vanilla extract
8 slices of white bread (any bread will do)
4 feijoas
How to make
Set oven temperature to 160C. Mix cream, eggs, sugar and vanilla. Whisk to combine. Cut crusts off bread slices and rip or cut into cubes. Place into a bowl. Remove flesh from feijoas and dice into the bowl. Pour cream mixture into bowl and fold through bread and feijoa.
Spoon evenly into cups. Place cups (ramekins) into a baking dish half filled with water (It stops the puds drying out) and place in centre of oven for around 30 mins or until set. Sprinkle with nutmeg.
FOOD FIGHT: 2 WAYS WITH PEACHES/ NECTARINES
Even though we are sisters, we have a very different approach to food and photography. Each fortnight we are going to choose the same ingredient or theme and post the result. These are results of our third food fight.
Peaches
Peaches, they evoke memories of summer whether it be tinned with ice cream or fresh from the tree. Unfortunately today the luxury of picking peaches off your next door neighbours tree or even better yours, seems to be dying out. Never the less they are a romantic and nostalgic fruit that have so many uses both sweet and savory.

Interesting Peach Facts
Vanessa's Dish - Peach pastries
It was partly disorganisation and also not knowing that nectarines were actually peaches that encouraged me to use tinned peaches. Previously I thought tinned peaches were a bit naff and common and really the only use was in a smoothy or on ice cream, which incidentally I can't stand.
Anyway it motivated me to get on with the challenge and without a garden to raid, tinned it would be. I am not a pastry person and when you can buy it for about $2.00 a block who would bother making it. I pulled out a block of flaky pastry from the freezer and put tinned peaches on top - it was as easy as that! My son loved them, we called them peach surprises and I was impressed how pretty they looked, they even reminded me of something that might come out of a French bakery...hmmmmmm
You will need
A block of puff pastry
A tin of peaches
Sugar
How to cook
Defrost the pastry
Cut into shapes - I used a pastry cutter but you could do squares easy enough without.
Place the peaches on top in an attractive design - I sliced them in half to make thinner slices.
Put on baking paper and sprinkle with sugar - brown or white.
Bake at 180 degrees for about 15 mins - keep checking as the sugar and syrup do burn.
When cooked take off the baking paper as soon as you can.
Sprinkle with icing sugar if you desire
Lovely with a coffee and a bunch of friends or something to put a smile on the kids faces.
Ingrid's dish - Honey baked nectarines with vanilla and brown sugar
The in-laws arrived a month ago and the first thing they like to do when coming from a chilly British winter, is get stuck in to all the juicy summer fruits on offer in New Zealand.
I had planted seedless watermelon and rockmelon to coincide with their visit in the hope that I could show off my green fingers but I had no luck and they are still creeping their vines along my patch quite happily. Anyone know if they will still grow through winter?
So when I saw my neighbours nectarine tree, edging over the fence, I thought, with a little breeze we might be ok here. I only needed a few, one nectarine to feed two. So with a little help from the British, I was on my way to making a tasty dessert straight from 'my' garden.
The beauty with this dessert is you can prepare it, and place it in the oven whilst your still eating your dinner, and it can be served straight from an overproof pan, keeping dishes to a minimum. And it looks really impressive in a 'french country' kinda way. Enjoy
Honey baked nectarines with vanilla and brown sugar
enough for 6
You will need
3 Nectarines (ripe and cut in half, one nectarine for two)
sheet of baking paper
3 tsp brown sugar
1 tsp vanilla essence or scrape out a vanilla pod
3 Tbsp honey
6 Tbsp yoghurt (drizzled with honey)
How to make
Set oven temp to 180C. remove stones and place cut nectarines on baking paper in an oven proof dish/ pan facing up. Drizzle honey, vanilla, and sprinkle brown sugar on top. Bake at 180C for 15mins, scoop up the juices and coat nectarines and bake for a further 15mins or until golden and sticky. Serve with yoghurt, drizzled with honey.
FOOD FIGHT: 2 WAYS WITH CHOKO'S
Choko facts
is an edible plant that belongs to the gourd family Cucurbitaceae along with melons, cucumbers and squash.
In Australia, a persistent rumour has existed that McDonald's Apple Pies were made of chokos, not apples.
Ingrid's dish - Curried bacon and choko soup
My neighbour and friend Johanna who also happens to be another food blogger gave us our next challenge, by offloading what felt like a trailer load of chokos at my door. She was glad to get rid, and said as she ran off, Good Luck!
I have to admit, I had no idea what the hell they were, and they sat in the fruit bowl for about 3 weeks until Johanna asked me if I had turned them into anything exciting yet. I felt guilt, I hate wasting food, especially as it was a gift (kinda...) So I did a bit of research and worked out they were more a filler food, not very tasty or flavoursome on their own but make great pickles, relishes, can be added to bulk out a stew, or can be stuffed. I couldn't get my head around them being added to sweet stuff, so I didn't even go down that track.
I've started on a bit of a soup phase, so I decided stew/ soup , its all kind of the same, and went about peeling and cutting my chokos in prep for a Curried Bacon and Choko soup.
Now I have to admit, peeling the damn things drove me nuts, I ended up using a small sharp knife and peeled them under the cold tap as they are so slimy and tough, but Vanessa had already finished her relish and said it was worth it in the end, so I kept trucking on.

Curried bacon and choko soup
Makes large pot - enough for 6/8
What you need
2 onions
25g butter
6 rashers of bacon (chopped)
6 chokos - peeled/ remove hard core/ cubed
3 chicken stock cubes dissolved in 3 cups of boiled water (or 3 cups of home-made or store bought stock)
2 tsp curry powder
salt/ pepper to taste
How to make
In a large pot, melt butter and saute onions and bacon for 5 mins. Add chopped chokos, and saute for a further 5mins. Add stock and curry powder. Bring to the boil, then simmer for 30 mins. Mash roughly with a potato masher. Season with salt and pepper. Add chopped parsley. Serve with yoghurt (optional).
Vanessa's Dish - Chilli and Choko Chutney
You would have thought being interested in food and living in New Zealand it would have been much sooner that the Opera sisters discovered chokos. Alas it was only through our blog and a mammoth seasonal photo shoot of fruit and vegetables that we really decided to conquer the choko. I am pretty adventurous when it comes to food, put it this way I will give everything ago once, but the choko has never inspired me. I didn't even know what it looked like on the inside or what you could actually do with them!
I remembered seeing choko chutney at school fairs and charity shop stalls. Its usually handmade by experiences Nana's and sounded like a plan for the food fight.
What a success, its more mellow than just straight tomatoes, cheaper especially if they have fallen off the neighbours tree and a great neutral base to add spice or heat.
Vanessa X
|


No comments:
Post a Comment